The Daring Bakers January Challenge - TUILES


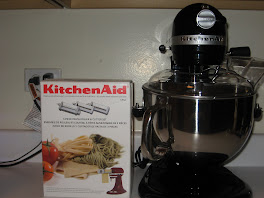
This month's challenge is brought to us by Karen of Bake My Day and Zorra of 1x umruehren bitte aka Kochtopf. They have chosen Tuiles from The Chocolate Book by Angélique Schmeink and Nougatine and Chocolate Tuiles from Michel Roux.
Last month I was not able to take part in the Daring Bakers Challenge so I was ready to get back into the Daring Bakers. This was a great challenge to come back on. The batter was really easy to prepare ,and I wish I had started this challenge earlier so I could have tried the savory recipes. Make sure to check out the Daring Bakers Blogroll http://daringbakersblogroll.blogspot.com/ to see all of the amazing creations.
Recipe:
Preparation time batter 10 minutes, waiting time 30 minutes, baking time: 5-10 minutes per batch. I cut out a template and made a small circle. My baking time was approximately 6 minutes.
Recipe ¼ cup butter (not melted but soft)
½ cup sifted confectioner’s sugar
1 sachet vanilla sugar (I used dash of vanilla extract)
2 large egg whites (slightly whisked with a fork)
1/2 cup sifted all purpose flour
1 table spoon cocoa powder/or food coloring of choice (if you wanted to add a color)
Butter/spray to grease baking sheet
Preheat Oven to 350F
Using a hand whisk or a stand mixer fitted with the paddle (low speed) and cream butter, sugar and vanilla to a paste.


Keep stirring while you gradually add the egg whites.


Continue to add the flour in small batches and stir to achieve a homogeneous and smooth batter/paste. Be careful to not over mix. Cover the bowl with plastic wrap and chill in the fridge for at least 30 minutes to firm up. (This batter will keep in the fridge for up to a week, take it out 30 minutes before you plan to use it).


Line a baking sheet with parchment paper or grease with either butter/spray and chill in the fridge for at least 15 minutes. This will help spread the batter more easily if using a stencil/cardboard template. I did not grease my baking sheet. I used a silt pad and parchment paper. Press the stencil on the baking sheet and use an off sided spatula to spread batter. Leave some room in between your shapes.


Note: If you wanted to add a color Mix a small part of the batter with the cocoa and a few drops of warm water until evenly colored. Use this colored batter in a paper piping bag and proceed to pipe decorations .
Bake tuiles in a preheated oven 350F for about 5-10 minutes or until the edges turn golden brown. Mine seemed to take about 6 minutes, but I think I could have left them in longer.

Immediately remove the tuiles from the baking sheet and proceed to shape/bend the cookies in the desired shape. These cookies have to be shaped when still warm. I baked them in small batches.


If you don’t want to do stencil shapes, you might want to transfer the batter into a piping bag fitted with a small plain tip. Pipe the desired shapes and bake. Shape immediately after baking using for instance a rolling pin, a broom handle, cups, cones…. I used the ends of whisks to shape some of my tuiles.


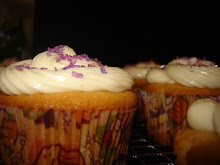
These were my 3 best ones. The other cookies I should have let them get a little bit more golden brown around the edges, but I was worried about burning them
Filling
I decided to fill my tuiles with a mascarpone filling
1/2 cup of mascarpone cheese
1 lemon zest and juice
2 tablespoons of powdered sugar
1/8 tsp of vanilla extract

I loved this filling it was light and delicious. I filled the tuiles with the mascarpone filling ,and then placed them over a berry salad of strawberries, blueberries, and blackberries that I had tossed in a little powdered sugar and lemon juice.


CRAIG'S CORNERS


"The mascarpone was creamy, light, and lemony. It was the perfect compliment to a refreshingly simple cookie dessert. Two thumbs up!"


32 comments:
Good job on the tuiles! I also had fun doing this challenge and enjoying my *official* taster's thumbs up. Cheers!
Looks good! Nicely plated too. :)
Mmmm, these look amazing! That filling sounds super delicious. Yum!
Beautiful tuiles! I love mascarpone filling and paired with the fresh berries, it sounds absolutely delicious!
Great job!
Great minds think alike (I too used berries and cream). Beautifully presented.
Your tuiles look great! Wonderful job!
Cheers,
Rosa
Adorable taste-tester! I love the photo of the various kitchen utensils used for shaping. And your tuiles turned out perfect! Great job!
Mmm, your tuiles look awesome! The filling sounds amazing =D!
Hahaa! I love the "Craigs Corner" bit! I also love mascarpone. And tuiles. And berries. Sooo you rock? Yes to that.
Your tuiles with berries and cream look marvelous, but I had to scroll down to see the thumbs up to make sure they really were THAT good..LOL Great job!
Hi Ruth, I can see that he really enjoy your creation. That must be very delicious. Look at his happy face!
Well done on this month challenge. You tackled this very well.
Cheers,
Elra
I liked this challenge, too. Even though I doubt I will make them again. I love all the fresh berries that you paired with your tuiles. Sounds superb. Well done.
Gorgeous results and wonderful step-by-step shots!
These turned out great! Thumbs up in deed. Great job on this month's challenge.
Good job there! Looks really delicious with the filling!
I like the two thumbs up! :) and the filling sounds wonderful!
Ha, I used my whisk handle too - it was one of the few round handles I had!
I was wondering how you managed to take all those photos :) But then I saw you had a helper.
Your tuiles are son delicious with berries and cream!!!
Ana
Great step by steps pics and lovely tuiles you have there! Love the lush berries too :D I'd definitely give them a big thumbs up if I were lucky enough to try them!
Nice step-by-step photos and stunning results set against the berries. Looks like you used every utensil to form the tuiles. :-) lol
those look beautiful! i'd give them two thumbs up!!!
Great Job! Your tuilles look great and i love the step by step pics too! Nothing like a picture of a satisfied customer too :)
how beautiful! these remind me of the cannoli i used to buy all the time when i lived in Philadelphia... mascarpone cream sounds so much better though. yum!
Nice combination, and very pretty!
That looks really amazing! Great job on your tuiles, I love pairing them with fresh fruit.
You make them look so easy!
I'm glad they turned out so well for you, and that they were so well received.
Oh, those berries! I love the idea of shaping them like cannolies.
Looks great.... what a good idea to use a knife to mold them!
These look really delicious! Beautiful work!
Great job! That looks wonderful!
Hey Ruth! I'm back to pass this award to you! Love your step by step detailed entries, and of course, your 'thumbs up' guy! lol You can retrieve the award here..
http://lisamichele.wordpress.com/2009/02/22/black-sesame-lace-cookies-or-candy-and-an-award/
Keep up the great work!
Post a Comment