Daring Bakers Challenge
THE PIZZA CHALLENGE
THE PIZZA CHALLENGE


The latest challenge is pizza. The main rule this month is I have to toss the pizza dough and make 2 crusts with the below dough recipe. This is a broken up into two days on day 1 you make the dough on day 2 you toss the pizza and bake. This was my first time ever tossing pizza dough or making pizza dough from scratch. The dough was very easy to make and it was fun coming up with topping ideas. I made 3 different types of pizza. Stuffed Crust White Pizza , Chicken Sausage, Mushroom and Olive Pizza & a Veggie Pizza!
BASIC PIZZA DOUGH
Original recipe taken from “The Bread Baker’s Apprentice” by Peter Reinhart.
Original recipe taken from “The Bread Baker’s Apprentice” by Peter Reinhart.
Makes 6 pizza crusts (about 9-12 inches/23-30 cm in diameter).
Ingredients
4 1/2 Cups unbleached high-gluten (%14) bread flour or all purpose flour, chilled
1 3/4 Tsp Salt
1 Tsp Instant yeast
1/4 Cup Olive oil or vegetable oil
1 3/4 Cups Water, ice cold
1 Tb sugar
Method:
1. Mix together the flour, salt and instant yeast in a big bowl (or in the bowl of your stand mixer)

2. Add the oil, sugar and cold water and mix well (with the help of a large wooden spoon or with the paddle attachment, on low speed) in order to form a sticky ball of dough. On a clean surface, knead for about 5-7 minutes, until the dough is smooth and the ingredients are homogeneously distributed. If it is too wet, add a little flour (not too much, though) and if it is too dry add 1 or 2 teaspoons extra water.


NOTE: If you are using an electric mixer, switch to the dough hook and mix on medium speed for the same amount of time.The dough should clear the sides of the bowl but stick to the bottom of the bowl. If the dough is too wet, sprinkle in a little more flour, so that it clears the sides. If, on the contrary, it clears the bottom of the bowl, dribble in a teaspoon or two of cold water.The finished dough should be springy, elastic, and sticky, not just tacky, and register 50°-55° F/10°-13° C.Or2.
My dough was very wet so I had to add more flour


3. Flour a work surface or counter. Line a jelly pan with baking paper/parchment. Lightly oil the paper.


3. Flour a work surface or counter. Line a jelly pan with baking paper/parchment. Lightly oil the paper.


4. With the help of a metal or plastic dough scraper, cut the dough into 6 equal pieces (or larger if you want to make larger pizzas). I only made mine into 4 pieces ,but it worked out perfectly and now I have pizza leftovers!
NOTE: To avoid the dough from sticking to the scraper, dip the scraper into water between cuts.
5. Sprinkle some flour over the dough. Make sure your hands are dry and then flour them. Gently round each piece into a ball.


NOTE: If the dough sticks to your hands, then dip your hands into the flour again.
6. Transfer the dough balls to the lined jelly pan and mist them generously with spray oil. Slip the pan into plastic bag or enclose in plastic food wrap.

7. Put the pan into the refrigerator and let the dough rest overnight or for up to thee days.NOTE: You can store the dough balls in a zippered freezer bag if you want to save some of the dough for any future baking. In that case, pour some oil(a few tablespoons only) in a medium bowl and dip each dough ball into the oil, so that it is completely covered in oil. Then put each ball into a separate bag. Store the bags in the freezer for no longer than 3 months. The day before you plan to make pizza, remember to transfer the dough balls from the freezer to the refrigerator.
Day 2 - Pizza Baking Day!
On the day you plan to eat pizza, exactly 2 hours before you make it, remove the desired number of dough balls from the refrigerator. Dust the counter with flour and spray lightly with oil. Place the dough balls on a floured surface and sprinkle them with flour. Dust your hands with flour and delicately press the dough into disks about 1/2 inch/1.3 cm thick and 5 inches/12.7 cm in diameter. Sprinkle with flour and mist with oil. Loosely cover the dough rounds with plastic wrap and then allow to rest for 2 hours

While the dough is resting I get my toppings ready for the pizzas!
TOPPINGS
Tomato Sauce
Italian Chicken Sausage
Sauteed Baby Bella Mushrooms
Broccoli
Broccoli
Black Olives
Ricotta
Shredded Mozzarella
Fresh Mozzarella
Minced Garlic
Ricotta
Shredded Mozzarella
Fresh Mozzarella
Minced Garlic
The day before I had made tomato sauce using canned whole tomato's with basil, one can of chopped tomato's, 1 can of tomato sauce, and a small can of tomato paste. I sauteed some yellow onions till soft. Add dried basil, salt ,pepper, and a bay leaf. Then add the tomato paste and cook it all for 1 minute. Then add in your canned ingredients and let simmer. I add about 1 tbs of sugar to bring out the tomato's sweetness once it had simmered for an hour. I like to use an immersion blender an to eliminate any large pieces. This can now be used for pizza or just pasta sauce.

I also used some Italian chicken sausage which I sauteed in a dry pan.


After it is done cooking I drained it on a paper towel.


Another topping I used was sauteed baby bella mushrooms. You should never wash mushrooms because they absorb a lot of water so I normally peal off the outer layer. If you don't want to do this you can just brush the mushrooms off.


I sauteed the mushrooms in the same pan I had cooked the chicken sausage in. I get the pan really hot and allow the mushrooms to release the water. The pan will have a lot of liquid from the mushrooms ,but let it continue to cook and the water will evaporate.Add salt and pepper to taste.


Another topping I had was some fresh broccoli which I cut into bite sized pieces

Black Olives were another topping I drained off the liquid and cut into slices.


For one of the pizza's I used ricotta. I mixed ricotta cheese with pepper and Parmesan cheese.


The Toppings


9. At least 45 minutes before making the pizza, place a baking stone on the lower third of the oven. Preheat the oven as hot as possible (500° F/260° C). NOTE: If you do not have a baking stone, then use the back of a jelly pan. Do not preheat the pan.
10. Generously sprinkle the back of a jelly pan with semolina/durum flour or cornmeal. Flour your hands (palms, backs and knuckles). Take 1 piece of dough by lifting it with a pastry scraper. Lay the dough across your fists in a very delicate way and carefully stretch it by bouncing it in a circular motion on your hands, and by giving it a little stretch with each bounce. Once the dough has expanded outward, move to a full toss.
I attempted to toss the dough I have never done this before. Right when you pick the dough up it immediately started to spread. Just spreading on my hands seemed to do a fine job. But when the Daring Bakers tell me to toss I toss! Sorry about the pictures being blurry, but you get the idea.


NOTE: Make only one pizza at a time.During the tossing process, if the dough tends to stick to your hands, lay it down on the floured counter and reflour your hands, then continue the tossing and shaping. In case you would be having trouble tossing the dough or if the dough never wants to expand and always springs back, let it rest for approximately 5-20 minutes in order for the gluten to relax fully,then try again.You can also resort to using a rolling pin, although it isn’t as effective as the toss method.
11. When the dough has the shape you want (about 9-12 inches/23-30 cm in diameter - for a 6 ounces/180g piece of dough), place it on the back of the jelly pan, making sure there is enough semolina/durum flour or cornmeal to allow it to slide and not stick to the pan. I used a regular baking sheet and it worked great.
12. Lightly top it with sweet or savory toppings of your choice.
NOTE: After 2 minutes baking, take a peek. For an even baking, rotate 180°.If the top gets done before the bottom, you will need to move the stone or jelly pane to a lower shelf before the next round. On the contrary, if the bottom crisps before the cheese caramelizes, then you will need to raise the stone or jelly.14. Take the pizza out of the oven and transfer it to a cutting board or your plate. In order to allow the cheese to set a little, wait 3-5 minutes before slicing or serving.
Pizza # 1
Sausage , Mushroom and Black Olive Pizza - Topped with tomato sauce, italian chicken sausage, sauteed mushrooms, black olives, shredded mozerella and parmesean.


I put this pizza back in so it would get a bit crispier. This was Craigs favorite!


Pizza # 2
Veggie Pizza topped with shredded mozerella, broccoli, & sauteed mushrooms. I put the cheese down on the pizza first. I think changing the order of the toppings made this pizza very crisp. This was my favorite pizza


Pizza # 3
White Pizza with a Stuffed Crust. I stuffed the crust with tomato sauce and shredded mozerella. I baked the crust first for 8 minutes and then I removed it from the oven and topped with the ricotta mixture, garlic and fresh mozerella. This one came out delicious but I put a bit to much cheese.
The Stuffed Dough


The stuff dough after I pre-baked the dough and topped with riccota, fresh mozerella and parmesean.

Hot right out of the oven. Make sure to wait a couple of minutes before you slice so the cheese can set.


The stuffed crust was Craigs idea and as you can see he approved!


Craig liked all 3 pizzas and I still have 1 more piece of dough in the fridge. I now need to decide how to top it! Thank You to the Daring Bakers for another fabulous challenge. Make sure to check out the other Daring Bakers Pizza's. http://daringbakersblogroll.blogspot.com/
65 comments:
Thanks for the comment!!!
You pizzas - I love love love the toppings on the veggie pizza! I'll bet I could do a whole pizza of it w/o cheese and people would still love it...mmmmm
Your tosses are wicked impressive! When I tossed mine, they didn't seem to spread quite so quickly as you described - maybe I used a bit much flour in the dough? I did throw in an extra handful and a half cause it wouldn't unstick from my hands. Did you add any extra to yours?
I love the pictures! And what an amazing job of tossing. You need a higher kitchen, I bet you could do even more amazing tossing.
Great work! You really put a lot into this challenge and your pizzas look great. I love the two thumbs up from your fan base.
Good twirling too, I couldn't manage it.
Wow, your pizzas look great! So that's what its supposed to look like when you use active yeast and can get in a really good toss! Great job.
ruth, thanks for dropping by.
your fillings look SOOO GOOD, and those tossing pics are classic!!!!
oh my I love your pizza combinations!! They sound and look insanely good! You make me wnat to do it agin now,LOL
Beautiful pizzas!
I love everyone's pictures of the tossing process..mine..not so good..my 12 year old was beheind the camera..LOL!
Love the last picture your photos are so detailed and show every step great work.
Wow, great tossing! Your pizzas all look scrumptious!
Cheers,
Rosa
Being vegetarian, I'm going with your veggie pizza, more so seeing it got a thumbs up. :)
Your tossing looks so good. I ended up with some impressive tears in mine! I was just thankful it didn't land on the floor.
Look at that oozy goodness! Those thumbs up photos are hilarious too :D
Amazing toppings! I enjoyed reading your post very much! :))
Great job and you've taken a lot of effort to add in your step-by-step pictures. Thumbs up like the pic!
I love the homemade stuffed crust!
what mad tossing skills :)
hahah your photos crack me up. nice tossing abilities! your pizza looks delicious!
Nicely done, great photos. I like your choices for the toppings. Good work on getting the tossing done, mine didn't work out so well.
your pizzas looks so good and perfectly tossed.
Wow, two more thumbs up! Your tossing is wonderful. Your pizzas are great. Excellent!
Oh, I like to see the photos of yours tossing the dough. Well done.
I am sure your pizza must taste great.
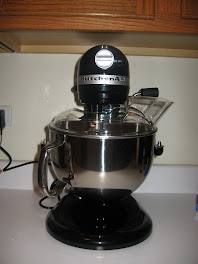
Your pizza looks just great... love it when the cheese is sliced and placed on.. makes it good and gooey. I see you got a new mixer. I have a red one and I love it to bits! Couldn't do without it!!
Fabulous job--very impressive tossing skills (you) and thumbs-up skills (him!). I'm still getting over the fact that you peel your mushrooms!
Ha, I love the visual commentary on the pizzas, and the veggie one looks delicious - was the time in the oven enough for the broccoli?
Great action shots, it looks like you had a lot of fun with this challenge!
Your pizzas look delicious! I love that you made a stuffed crust one.
Your first pizza looks almost professional. I didn't realize there could ever be such a thing as too much cheese--so cut me a slice of that one, too.
Great job!
Wow - your pizzas look awesome! They look delicious. Great job!
Thanks for all the nice comments. Craig is excited that he is such a hit!
Kayo - I did have to use extra flour I added more with 1/8 cups and I think I did that 3 times.
Jenny - The time in the oven was enough time for the broccoli it still had a crunch but it was cooked enough.
Great pictures! I feel like I was there, lol. Glad to see the man approved so heartily. Your pizzas look fantastic!
You have some amazing tossing skills! Love the stuffed crust idea - extra cheese is awesome.
Great looking 'za! That's a lot of 'thumbs up' you got from your man. I bet he'll be asking for this recipe again!
OMG they all looked great but the white pizza looked awesome! I couldn't mine to spread like you did when I tossed it - I am very impressed!
Great job! I love the stuffed crust white pizza! That will have to go on my list for my next pizza night!
Not only do these pizzas look fantastic, they taste fantastic. If I had to eat pizza every meal for the rest if my life, I would definitely choose the Chicken Sausage/Black Olive combo!
whow whow whow !!!! Great tossing !!!!!
I think it was a good idea to make 4 pizas with that quantity of dough.
Yours were entirely home made, from A to Z ! They look gorgeous ;) and I'm not the only one to think that ;)
Now that's one pizza tossing pro!!!! Despite the blur it looks as if you had a good grasp of the tossing technique!! The finished product(s) look fantastic as well. Any leftover stuffed crust by chance???
WOW!! When can I come over for pizza? Yours look YUMMY!! Now I gotta make more dough so I too can have stuffed crust!
Great Tossing. Your pizza looks really yummy.
Each pizza that you made ROCKS Ruth! Fantastic...what a great toss up too! Thumbs up from me as well!~!
You should win an award for the step by step tutorial!
Excellent pizzas!
wow the flying pizza . . ... lol! great job as you had them taken every single steps...well done, just awesome.
the ricotta cheese pizza looks amazing! i could literally eat my weight in ricotta cheese and be happy. yum!
yay...my pizzas were square as well. That tossing effort looks quite phenomenal and the pizzas look fabulous!
What the great tossing! The pizzas are delicious looking!
I love the step by step pictures. Awesome pizzas and toppings!
Your pizzas look so yummy and I love the step by step. I know how hard it is to do that while you are baking!
Ruth, you sure went through a lot of trouble to photograph each step in this lengthy process of making a pizza; kudos to you! The men in your life sure look happy to have you around. ;-)
wow, thanks. I'm definitely going to ask someone else to take the picture next time. :p
yours looked amazing! I like the stuffed crust pizza. maybe I should make it too.
Thanks for the comment...your pizza's look sooo good!! By the way, we have the same kitchenaid mixer, except mine's older and it's grayish in color--happy baking!!
I love the photos...they tell such a story---especially with craig's thumbs up!
Oh wow, looks great! I wish I had cut mine into 4 pieces instead of 6. Next time...Great pictures!
+Jessie
a.k.a. The Hungry Mouse
love the play by play pix and great tossing skills! you should've had Craig toss too. :)
Wow, nice pizzas! Hotness! :)
BTW, I got an email from La Cense asking me to ask you to update your shipping address on their website so they can send you over your prize! Please email me at feistyfoodie (at) gmail when you've done so, I will pass along the message :) I can't wait to see what you do with everything!
Great job!! I love your toppings and I love your husband's approval. I also like to take pictures of my hubby eating the food!
You did a great job of taking pictures along the way. Your husband is cracking me up with the faces. Your pizzas look great!
I loved your sauce! Great job with the tossing! I need more practice! ;)
Very yummy looking pizzas!
I like your pictorial of the entire process. Stuff crust pizza! Wow! Great job on this challenge!
Oooh, I thought about trying broccoli, but wasn't sure if my hubby would go for it. But really he eats just about anything, so you've inspired me. I'm gonna try it next time. Great tosses!
Hi Ruth, thanks for passing by for my blog so I have discovered yours. It's curious how enjoy our boyfriends with our adventures in baking & cooking. Mine is still enjoying pizza challenge and I will surprise him with your white pizza, it looks delicious! Happy Halloween!
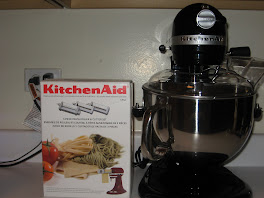
By the way... my boyfriend bought me last Christmans the Kitchenaid and make me so glad all this year that I'm thinking on buying some accessories like pasta maker. Do you recommend me buying it?
Your pictures are great! I love how you show all the steps!
Great tossing skill there! The pizzas look tasty!
Amazing step-by-step and great looking pizzas!
wonderful Pizza,I love the way u have described it.Simply gorgeous and tempting pizza.
Wonderful job with the tossing!! All the pizzas look great, but I am so wanting that stuffed crust right now :)
Post a Comment